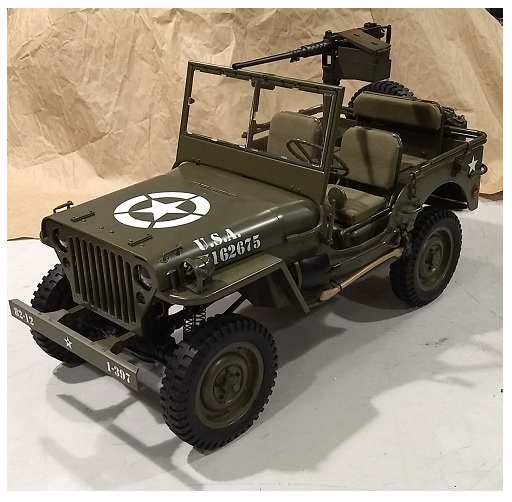
This is my review of the Rochobby "Military MB" radio-controlled 4x4 in 1/6 scale. This has apparently been on the market for some time (at least a year) but I happened to stumble across it online and just HAD to order one! So I did. It arrived in about 3 days and, although the outer box was pretty tattered and beaten, the inner box was fine. The inner box was composed of a foam packing "suitcase" for the jeep, covered by a cardboard sleeve. It was packed pretty well, and I think I'll keep the foam "suitcase" for transport of this expensive new toy!
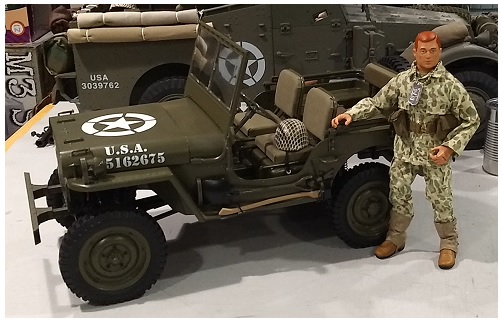
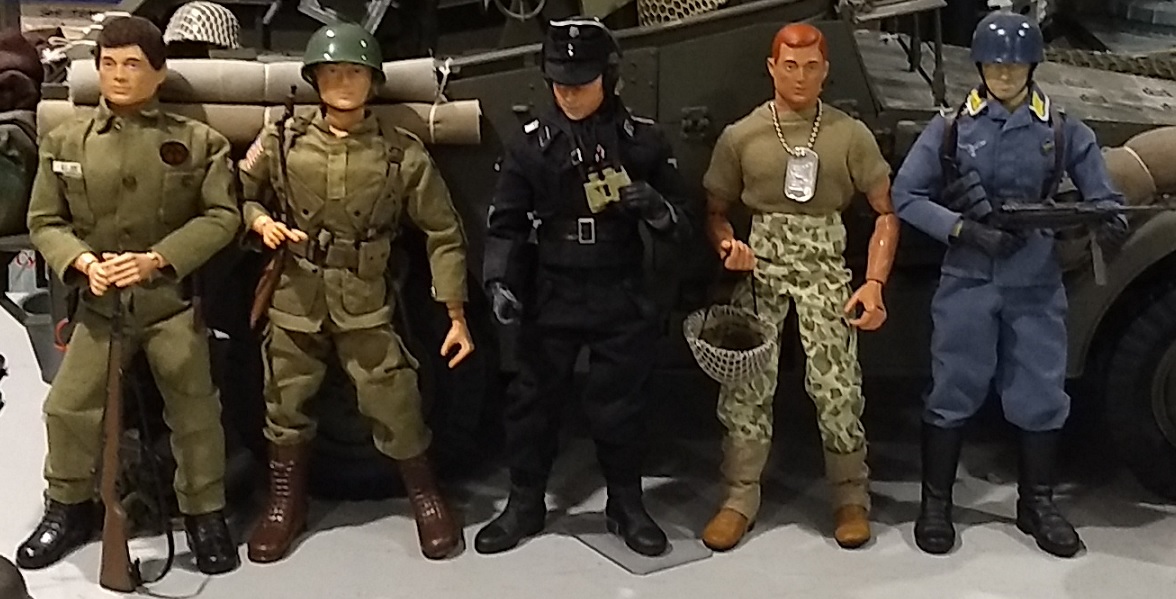 When the Joes assigned to the Joe Room first heard of this new addition to the collection, several volunteered to be the permanently reassigned Jeep Driver. With only 1 job open, I'd have to hold tryhouts, to see which Joe fits in the vehicle the best.
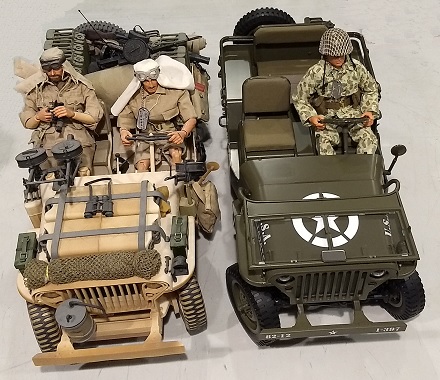
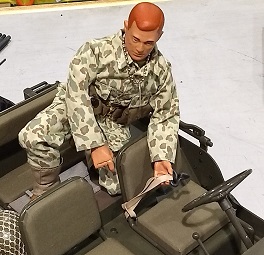
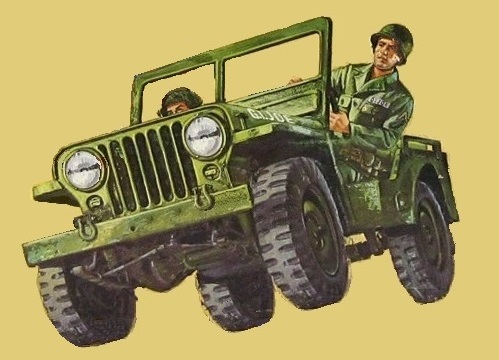
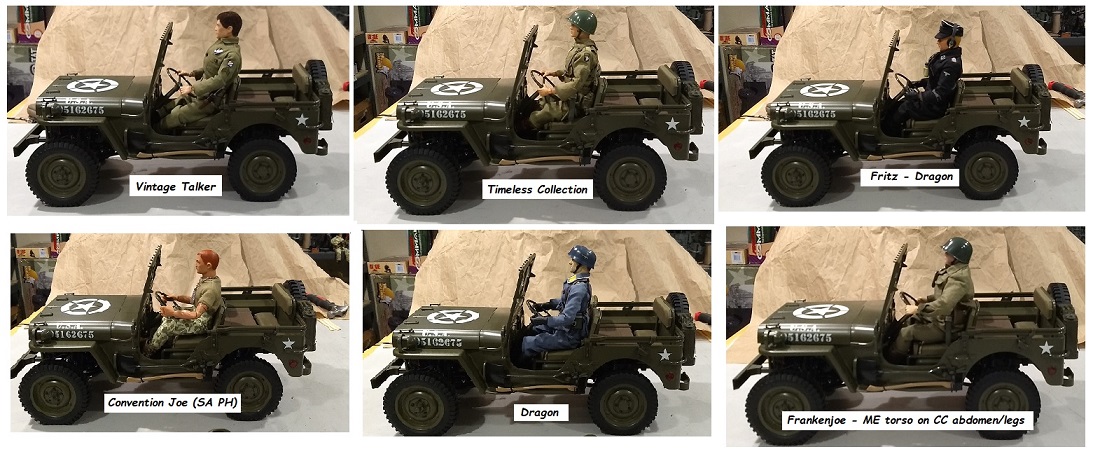 The seat looks pretty detailed with the foam seat and cloth cover. Well, ok, it's not foam. It's hard. But it LOOKS like it should be foam. Anyway, the height of the seat pad made it look like Joe would be sitting up too high. Like a kid sitting on a phone book so he could see over the dash. Upon closer inspection, it looked like everything was higher on the floor of this jeep! It looks like they must have raised elements to accommodate the R/C equipment below. This would make Joe sit up even HIGHER! The best solution would be to get in there and lower the seats with my Dremel (remove the screws that hold the seat pads, then Dremel off all of the support pegs) to make a nice, smooth seat that's as low as possible. I'd have to put a thin piece of sheet plastic there, covered with the same cloth. Maybe I will, some other day. But today, I just wanted to find the best Joe for the vehicle. As you can see from the pic at right, they all look mighty tall in there, but the Super-Articulated (SA) Joe seems to be the winner. Thanks to his short torso, he looks the most realistic in the driver's seat. This particular SA Joe is one GIDefender picked up for me at a convention years ago. He came with a dogsled and Arctic gear. I think this figure represents the pinnacle of Joe evolution... the PH atop an SA body with big feet (easier to stand). Too bad the original Joe hadn't been constructed this way! He has become my designated Jeep Driver.
 Another thing I noticed when I added a figure was that the weight of the figure made the driver's side of the jeep sag! The suspension is so sensitive that just the weight of a figure sinks half of the body! That might be great for crawling an empty jeep over obstacles, since it'd give more articulation of the suspension, hence more traction, but for my JoeHead purposes, it wasn't ideal. Since the suspension is R/C spring type, rather than authentic leaf spring type, I guess it's the nature of the beast. I'd either have to re-fill the shocks with stiffer oil, alter the suspension to add leaf springs, or come up with some OTHER solution. I opted for the latter, and plopped another figure in the passenger side to even it out. Problem solved! I also noticed that this regular SA figure actually has a shorter top-half than my PH SA! I fiddled with them a little bit and decided the blonde guy was just slouching. Redhead PH SA got to keep his new job!
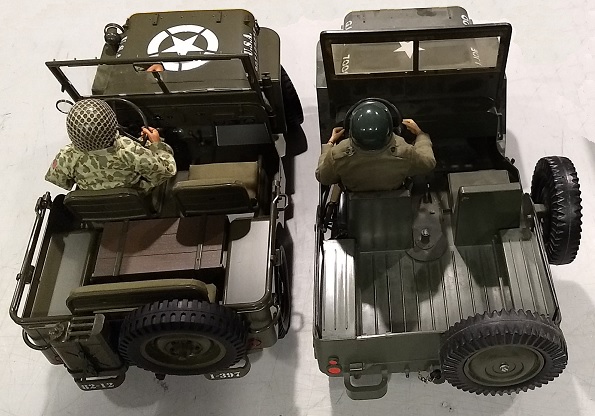
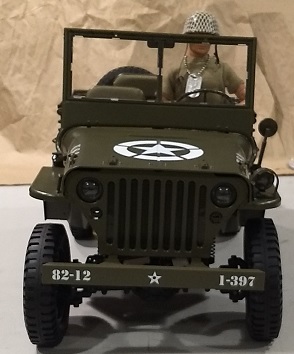
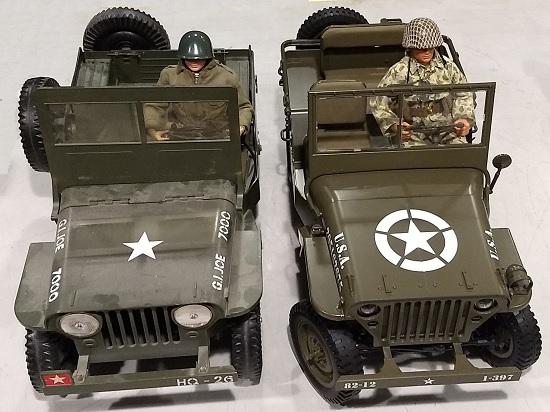 I figured I'd compare the Rochobby Willys MB to the Hasbro jeeps I have on hand. Here you can see it beside the CC/SA-era Hasbro desert jeep. the Hasbro jeep appears to be about the same size... despite the fact that the desert rat jeep is prepared for a mission whereas the MB looks like it's fresh from a showroom. I seem to recall people whining about the Hasbro jeep back in the day, claiming it was undersized. If so, then the new Willys MB is undersized, too. I think they're shockingly close. In the next pic, you can see the Willys MB beside the venerable 5-Star Jeep. They don't look very different from the front, but from the rear the difference in size is apparent. the 5-Star is a bigger jeep. Which is more to scale? Which is correct? I really don't care. They're all "Joe Scale" and work out fine! Any/all of them are light years away from the crummy old blow-molded silly-looking jeeps of the late 1960s to early 1970s. Overall, I'd say that if this is *not* properly in-scale, then it's close enough for any kid who wants to play with one (like me)!
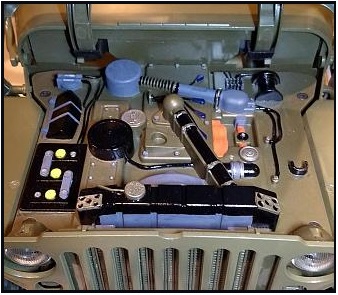
 The hood was pretty tight, but with much trepidation, I opened it. After opening and closing it a few times, it operated much more smoothly. The hood latches are located on each fender, and they seem pretty fragile. You'll need to use great care when closing the hood to avoid accidentally snagging one of these and inadvertently snapping it off! Beneath the hood is a cover plate that disguises the R/C guts with a suggestion of an old Jeep engine. There's even a little rod uner the hood to pull down and wedge the hood open! With a little creative painting, the engine compartment could be made a bit more attractive. While scale modelers would scoff, I think this is just dandy on the R/C Willys. After all, they could have made the hood fixed and not hinged at all! Kudos to the designers for this nice touch!
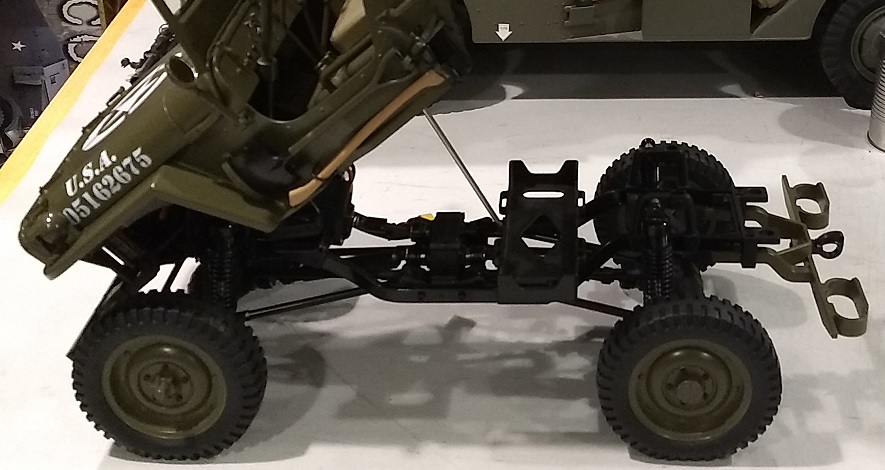
 The hardware under the hood isn't the only area of interest... lifting up the body and revealing the chassis is pretty cool, too! There are two little clevis pins (conveniently located and easy to reach) under the body. Pulling the pins releases the rear body, so it can hinge from the front end to reveal the R/C hardware. My first impression was how well made this vehicle is! I have no experience with serious R/C equipment, so maybe it's not as cool as I think... but after seeing the toy-grade stuff, it sure SEEMED pretty impressive! Notice the large battery box. Not sure how large a battery it can hold, but the 5000mah is one of the recommended batteries, so I suspect the oversized battery box gives the user some flexibility. Speaking of nice touches, the wheels are soft rubber, so they will surely grip off-road. And the spare tire is actually a spare, rather than just a decoration! Another nice touch by the designers!
.
ACCESSORIES
PEDESTAL .50 MG
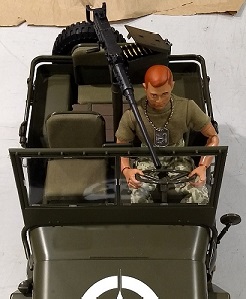
 This seemed like a "must have" accessory, even if it WAS $40. It was extremely well packed and looked pretty detailed. After carefully removing it from the box and assembling it, I was pretty impressed. I mounted it on the jeep. It looked really cool. Then I tried to add a driver. Hmm... they didn't think this one through. Even if it wasn't necessarily scale-accurate, they should have mounted the pedestal further back, or made it tall enough to clear a driver's head. Either way it would have solved the "ammo can in the head" problem for the poor driver. It's pretty much locked in as a static decoration. Lousy for play value. For an R/C or model fan, this is a great accessory. For a JoeHead, it's uber-crappy. It'd be easier to toss in a 21C .50 MG out of a convention "buck box" and call it good; it'd LOOK as good and would have a heckuva lot more play value. Since I've already wasted my cash on this lousy accessory (and it was a gift, so I have to smile and be positive), I'll see if I can make it work with some modification. I think the biggest mod will be to cut the pedestal with my trusty Dremel and add a piece to extend the height enough to let the ammo can clear the driver's noggin. No, I don't recommend you buy this accessory. Fabricating one would be about the same amount of work as modifying THIS one!
RAGTOP
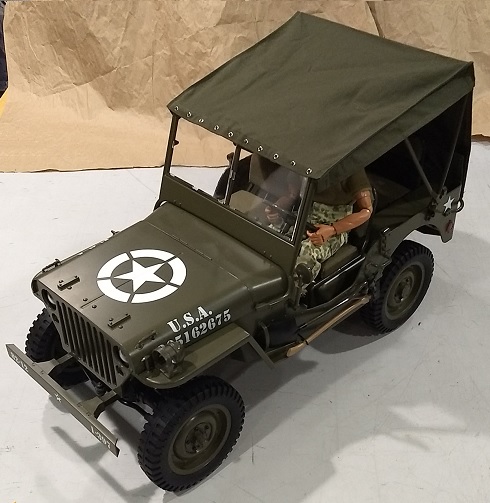
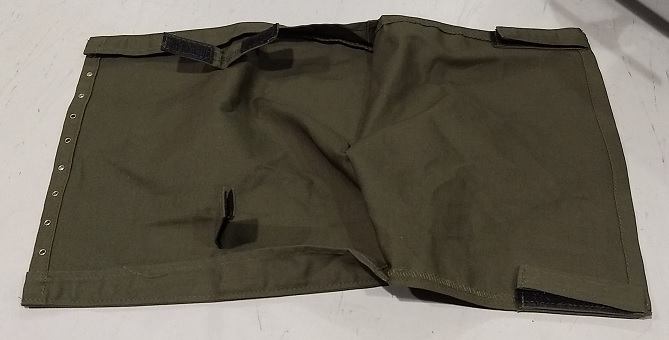 The "canvas" soft top seemed like a no-brainer at $17. I figured it'd be worth that in time alone, if I had to make one myself. So I picked it up. Unlike the disappointment from the .50 MG, this accessory seemed better. Not perfect, but better. I put the ragtop on the jeep and it looked fine, with only minor mods required to make it acceptable. In the pic of the flat cloth ragtop, see those goofy rectangular tabs? Those are double-layer cloth tabs with velcro in between. Zip 'em open and wrap them around the support hoop in the ragtop frame (that's already on the Willys). From the outside, it looks OK, but peeking inside, you see those incredibly (needlessly) huge tabs hanging down inside the jeep. That will be easy/cheap to modify, though, so it's not a very BIG gripe. On other issue with the ragtop is the incredibly small nibs along the top of the windshield to hold the grommets along the front edge of the ragtop. They don't all line up right, and it's impossible to get them all on a nib, so there will be a grommet or two flapping in the wind. Maybe I'll come up with a strip of 2-sided clear tape to hold the top just above the grommets. Not a big deal, but something to fuss with. Minor issues aside, the ragtop seems like a great accessory. And, unlike the MG, it doesn't carry a ludicrous price tag.
TRAILER (and Hasbro 37mm Cannon)
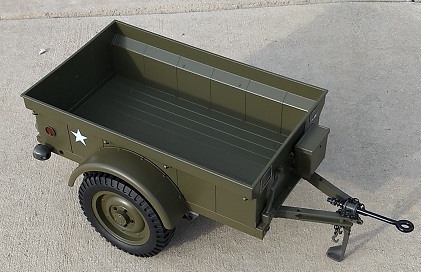

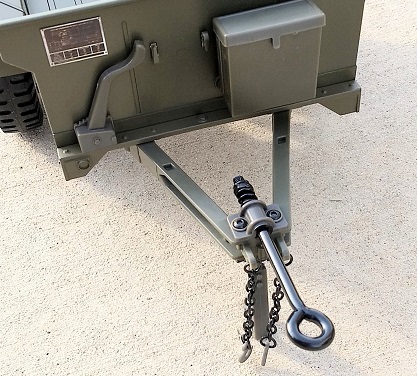 TRAILER - Here's the Rochobby trailer that matches the MB. The unit markings all match on both Willys and trailer. The trailer shares the same wheels as the jeep; very soft and squishy. The trailer seemed like pretty expensive accessory, but the detail is amazing compared to the vintage 5-Star Jeep's trailer. Although you can't see it very well in the pics, beneath the top lip of the trailer there are a bunch of little hooks where you'd secure the tarp. Although it's not an available accessory, it wouldn't be difficult to build a tarp for the trailer, with elastic loops to secure it to the trailer itself. The trailer tongue "kick stand" operates the opposite of the 5-Star's tongue stand. This one folds FORWARD beneath the trailer hitch, rather than BACKWARDS between the arms of the trailer's A-frame. I have no idea which is more realistic. I do know that this Rochobby trailer is pretty cool. Look at the photo of the underside of the trailer. You're looking at metal leaf springs that actually function the way leaf springs should! Wow! What a nice little bit of detailing! The little box on the trailer's front wall (on the jeep side) has a hinged lid. No idea what's supposed to go in there, but it's cool. The trailer chains seem to be metal. Nice touch. I have no idea where to hitch the safety chains to the Willys... nothing was intuitively obvious and everything I tried hooking them to seemed too short (for cornering). I just tossed them back over the A-frame arms and didn't bother hooking them up.
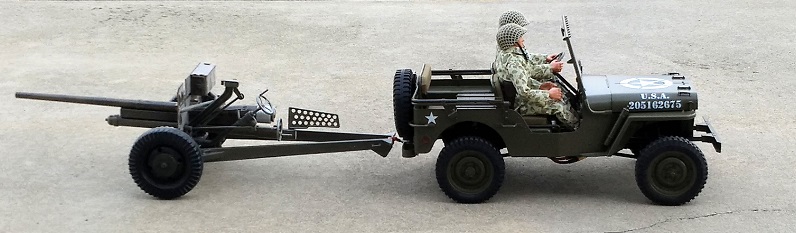 The pintle hitch on the Willys operated as you'd expect, and clamped the trailer's ring well enough to drag the trailer around on pavement, gravel, and through grass. I concluded that the trailer is pretty awesome and is a must-have accessory. Although if you're on a budget and have a Hasbro 37mm cannon on hand, the jeep looks AWESOME pulling it! I put 5-Star Jeep wheels on my 37mm cannon, because the silly little wheels that it came with look very out of scale. Maybe the stock 37mm cannon wouldn't look quite as cool. When pulling the Hasbro 37mm anti-tank gun, those hollow blow molded wheels sure sound funny compared to the soft rubber (quiet) wheels on the Willys! I'm not sure which I like better behind the jeep, the matching trailer or the 37mm cannon!
MODIFICATIONS (Steering Wheel, Belts, MG Extension and Engine Detail)
 The steering wheel moves via servo. I didn't want to burn out the servo if Joe's hand got caught in the steering wheel spokes, so I entertained a bunch of possible solutions (clip the power wire to the servo? Just unplug the servo? Put some sort of free-wheeling link in the steering column?) then it hit me! I'd just unscrew it! The steering wheel is just molded onto a nut. The nut screws onto the steering column. The whole steering column rotates as the servo moves. If the steering wheel (the nut) isn't tight, then it'll partially screw and unscrew repeatedly as the Willys turns! I could put Joe's "Buzz Lightyear" hands on the steering wheel with a death grip, and even though the servo was moving and the steering column was turning, the steering wheel would be held still in Joe's mighty hands. Too easy! If I wanted to show off the steering wheel feature, just remove Joe and spin the steering wheel down tight, and away it goes! Simple is best sometimes.
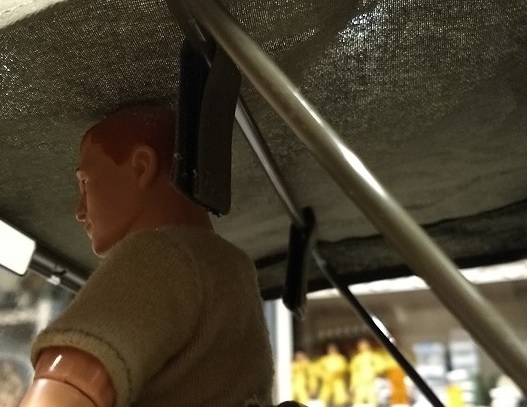
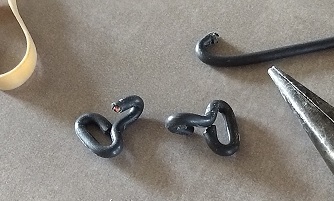
Here's another tip... seatbelts. When whipping around tight corners, Joe has a way of involuntarily bailing out. I made seat belts out of rubber bands to keep Joe in. The rubber band is looped through itself on the inboard seat post and the rubber band stretches across Joe's lap and gets hooked to the seat post on the other side. The hook is made from a little piece of #12 house wire that I bent to shape. There's a pic of Joe showing you how I shaped it. Again, simplicity won the day! I did some on-road and off-road tests and these seatbelts did the trick. I had one failure, but it was due to an old, dried-out rubber band that snapped, sending Lt Bob Hope tumbling out of the passenger side on a sharp left turn. He survived, and I used a fresh rubber band seatbelt.
The steering wheel moves via servo. I didn't want to burn out the servo if Joe's hand got caught in the steering wheel spokes, so I entertained a bunch of possible solutions (clip the power wire to the servo? Just unplug the servo? Put some sort of free-wheeling link in the steering column?) then it hit me! I'd just unscrew it! The steering wheel is just molded onto a nut. The nut screws onto the steering column. The whole steering column rotates as the servo moves. If the steering wheel (the nut) isn't tight, then it'll partially screw and unscrew repeatedly as the Willys turns! I could put Joe's "Buzz Lightyear" hands on the steering wheel with a death grip, and even though the servo was moving and the steering column was turning, the steering wheel would be held still in Joe's mighty hands. Too easy! If I wanted to show off the steering wheel feature, just remove Joe and spin the steering wheel down tight, and away it goes! Simple is best sometimes.
Here's another tip... seatbelts. When whipping around tight corners, Joe has a way of involuntarily bailing out. I made seat belts out of rubber bands to keep Joe in. The rubber band is looped through itself on the inboard seat post and the rubber band stretches across Joe's lap and gets hooked to the seat post on the other side. The hook is made from a little piece of #12 house wire that I bent to shape. There's a pic of Joe showing you how I shaped it. Again, simplicity won the day! I did some on-road and off-road tests and these seatbelts did the trick. I had one failure, but it was due to an old, dried-out rubber band that snapped, sending Lt Bob Hope tumbling out of the passenger side on a sharp left turn. He survived, and I used a fresh rubber band seatbelt.


MG Fix - Above I mentioned the MG was mounted too low for Joe to drive and not get whacked in the head with the ammo can. Dunno whether it's "scale accurate" or not, but I didn't like it. I wanted to get that dadgum MG *up* a little higher, so the driver wouldn't be knocked unconscious by his own gunner during a late-night raid on an enemy airfield (like the SAS did in North Africa). So I took out my trusty Dremel tool and cut the pedestal mount in two! It was emotionally tough to cut up a brand new $40 MG. HAHAHA! No, it wasn't. It was easy! The pedestal has a few screws holding it together, so I disassembled it first to see what was in it. I decided the best way to extend it would be to cut it, insert a dowel in the pedestal, then find a way to fill the diameter of the exposed dowel to match the diameter of the rest of the pedestal tube. Should be easy! I chose a spot to cut that was about the same height as the seatbacks. Then I could leave the bottom part of the pedestal mounted full-time, and just slide in the .50 MG when I felt like it. Cutting the dowel took almost a minute. Then I had to put a groove in one side to match a ridge inside the pedestal tube. That took almost a minute. So in about 2 minutes, I had a fix. Here's a pic of the extended pedestal, showing the part that sticks down into the base. Notice how the MG sits a bit higher now, so it'll swivel without knocking out the driver. While the low MG might not bother some people, it was a big deal for me. Problem solved!
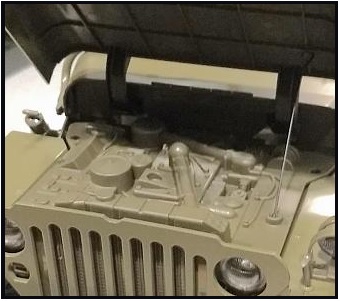
Engine - the fake engine plate under the hood was olive drab. There were no painted details, and it looked pretty plain. I went online and looked at some REAL jeeps from WWII, and most of what was under the hood really WAS painted olive drab. I decided to go ahead and paint some of the details anyway... just because I wanted to. Interestingly, the "engine plate" is actually part of the structure of the front clip on this MB model. It supports the front fenders and grille. I removed it (it was held in with screws), and painted it. After it dried, I reinstalled it. I'm SURE I didn't paint anything that looks authentic, but I think it looks better.
I did a quick video of the MB's first road test. Although it seems screamin' FAST in the house, outside in the driveway, its top speed LOOKS like it's about a 45mph scale speed to me, so I guess it's fine. Incidentally, you can run this in racing mode or crawler mode, depending on how you program the ESC with little jumpers. I have no idea what an ESC is, but I looked at the instructions. If I removed the shorting bar, it'd be in "crawler" mode, which I figured meant "powerful and slow." That's where I put it, and left it alone. I ran it on pavement, in tractor-flattened grass, along a gravel/dirt road, on packed (dry) mud and up a pretty steep dirt pile. It had PLENTY of power to haul two heavy SA Joes and pull stuff (37mm cannon or trailer). The controller is pretty touchy and you go from zero to "hang on to your hat" in no time flat, so this is *not* a kid's toy! After you get the hang of a light trigger finger, it's easy enough to control at scale (looking) speeds. I ran it out in the field until it died on me (when it goes out of range it'll just stop). I paced of the distance and reckon it was 56 yards. That's pretty far! I doubt anyone would WANT to operate this jeep that far away, just because it's fun to watch and you can't really SEE it very well 56 yards away!
Here's a link to a short video I made of the jeep tooling around on the flattened grass in the field (click on the little jeep pic):
Here's the URL (in case the icon doesn't work): https://rumble.com/vp1ndt-atcs-military-mb.html
R/C fans might not like its capabilities, and modelers might not like its inaccurate scale ("it's 1:5.75 not 1:6!"), but I think JoeHeads would love it as a solution to the longstanding problem of not having an R/C jeep for Joe! Along with the R/C M5 Stuart Tank, the 1/6 Mechanized Infantry is ready for military operations! (Stay tuned, as I'll add to this page after I receive a battery and do some "road testing" of this little Willys!) - ATC
Click the logo to go home